Showing posts with label baby toys. Show all posts

Saturday, November 12, 2011

Tutorial for toy guitar strap

Gideon has this guitar that he loves. Dave and I were saying that he needs a strap for it so he can be more like Daddy. So, while Dave took Gideon on an errand, I sat down to make one! Here's what it looks like- very adjustable and we can take it off for when we aren't able to supervise him with it (he really likes wrapping things around his neck.


Maybe this will help him learn how to hold the guitar correctly.


So, I started out trying to put a shoelace through the little holes but it wouldn't fit. So, I found some ribbon and made a couple loops.


I just hand sewed them on and turned so the sewn part is inside the hole.

Then, I chose my fabric (from an old pair of jeans), hemmed the short sides and then made a tube with the long sides.Turn it right side out.
I added some batting to it as well so it'd be cushy on his shoulder and neck.
I stuck the batting and the shoelace inside the tube and sewed up the ends. Then did a little basic quilting so the batting wouldn't move around too much.


Tada! A guitar strap! Just tie the shoelace to the loops of ribbon- very adjustable! As with everything that goes around the neck, make sure to always watch your baby so they don't strangle themselves.

Thursday, November 10, 2011

Tutorial to make a sock doll (from a knee sock)

I made another sock doll yesterday so I could post a tutorial. I'll be sending this one to my niece (you are welcome, Nicole). So, here's how to make it!

I used a serger to sew up the seams but a regular sewing machine will work just fine.

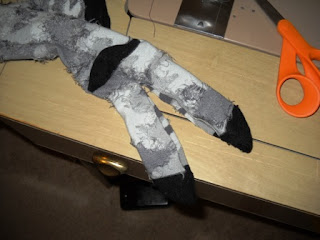
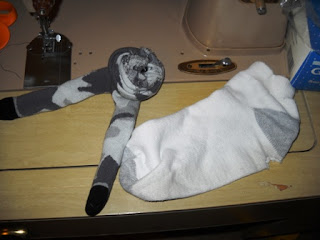
Take a knee sock and imagine the heel as the butt of the doll. Turn the sock inside out and cut from the toe to about an inch from the heel. Sew up either side (I rounded the toes a little to look more like feet.)

Then, choose how tall you would like the doll and cut off the top of the sock. Cut about an inch from the band of the sock and cut the middle part in half (for the arms).

Turn it right side out and then stuff the legs of your doll. I rolled up an old athletic type sock and put it in the butt so the doll will sit up on it's own and has a little more weight to it. I also cut up another sock and added it for the extra weight but was a little softer when mixed with the other stuffing. Go ahead and stuff the arms and sew those as well.


Once it is all stuffed, sew up the top.
 The top part you cut off will become the hat. Sew that up and turn it right side out. Place it on the top of the head and hand stitch with a coordinating thread. Separate the head from the body by wrapping thread around and sewing through the neck. (This always makes me feel a little weird and violent.)

Sewing on the arms is a little harder and has to be done by hand. I fold over the sewn part and then sew flat to the side (so the very end is hidden). When one is sewn on, I stab the needle straight through the body to the other side to sew the second arm.

Once the arms are done, you can sew eyes and a mouth or just leave them without. And, you are finished! This could be done with smaller socks, you would just need two instead of one.
  Just remember, making these is not a science. If something doesn't look quite right, tweak it until it does. Have fun!

Wednesday, November 9, 2011

I made a sock doll for Gideon!

I've been wanting to make a doll for Gideon. He doesn't have any stuffed animals out because he pulls the fur or fuzz off of them to eat.  But, I figured a sock doll would be harder for him to pull threads from.

I looked at a few tutorials online and then just started cutting. I think it turned out pretty cute. I used a regular pair of athletic socks to stuff the middle so it's a little heavier and can sit on its own. The rest is just regular stuffing.


The first thing he did when I gave it to him was give it a hug!


Then he just carried it around by its head. He hasn't played with it much yet but at least he has something soft and cuddly if he wants it!

Friday, October 21, 2011

Thrifting toys for Gideon

I love going to thrift stores! And, I buy lots of stuff for Gideon at them. Clothes and toys can be great finds. Especially when new clothes and toys are so expensive! $15 to $30 for a toy the child might not even like seems too expensive to me.

I always carry a notebook with me that has a list of things I'm watching for at thrift stores. Kitchen stuff, what books I need or want, sizes in kid's clothes I'm looking for, etc. And, I always look through the kid's toys. There can be some really junky stuff but every once in awhile, I find something that Gideon will really love.

I like to look for musical instruments. I'm still on the lookout for a small keyboard or piano and any percussion instruments. But, I found a Little Tikes guitar several months ago. He loves it so much! I think the batteries need to be changed though because it's started making some awful noises instead of music. It might also be because Gideon likes to stand on it. But, it was $1.50. Can't beat that since new ones run about $14.


The keyboard behind him was also a thrift store buy- $1 and we cut off the cord. He likes to walk on it- apparently it's a nice foot massage.

Dave had Thursday off so while Gideon napped, I went thrift shopping without a baby! It was heavenly! No fussing in the stroller, no trying to run out the door or pull things off the shelves.

I went to the local Hospice thrift store that is always so well organized. and their prices on toys are AWESOME.


We have been looking for a doll stroller or grocery cart for months. He loves to push things around and we knew he would love to have one at home. It was $1.50! And pretty sturdy. Most of them that I've seen new at stores look like they would break if a kid sat in them and are usually more than $15. Gideon already tested his weight in this and it passed.

Sunday, December 6, 2009

A few things I've made for baby


The dragon is something I've been working on for a while and finally finished. He's adorable and now I just need to make a little knight that can fight with him. I ran out of the light colored green yarn so I used a darker color and just did spots of the light green on them. I actually prefer it that way to one color.
The vest I knitted in about three days- over a weekend though, so I had lots of time to work on it. It's adorable and I can't wait to put it on him. I found some white yarn that is SO soft in my stash while I was organizing and I'm making another one for him. I figure he can wear it over his colored long sleeve shirts! I skipped the buttons on the gray one but I think I'll put buttons on the white one.

Thursday, November 12, 2009

It's a...

BOY!
We were very surprised when we opened that envelope after the ultrasound! For some reason, we both were convinced it was going to be a girl. We are very excited to be expecting our little man though. Dave is SO excited. He wants to show the picture of little man's stuff off to everyone but I told him he wasn't allowed to post it anywhere. Just seems a little weird to me.

It was so cool to see him on the screen though. It's weird that he's actually in there, swimming around. He moves a lot more than I can actually feel.

So, since I had been thinking girl all this time, I had all these ideas for little dresses and outfits I could sew for her. Little play food sets I would make, little dolls and stuffed animals. Well, now I have to come up with ideas for what to make for my boy! I compiled a little list of things I want to make. I'll post them here in case any other parent of a boy needs some ideas. Let me tell you, there are a lot more tutorials and ideas out there for little girl stuff!

Fabric barn (also includes dollhouse tutorial)
Felt ball (I have a ton of felt that I'll be able to use for these!)
Rocket ship (I love this one)
Crocheted dragon (I've wanted to make this for awhile now... just to have made it. But, it will make a great toy for a little boy! I'm thinking I'll need to modify a crocheted doll pattern to make a little knight so the boy can have battles.)
Felt castle (for the dragon to attack!)

I also found a few patterns for crocheted cars on Ravelry that I might try. And lionbrand.com has tons of little animal patterns.

So, my son will not be without homemade toys. I hope to add Lincoln Logs, some wooden blocks and other wood toys. I want to keep my house as plastics free as possible... also as few battery operated toys as possible!